Lightwave 2018 brought a new PBR render engine with an unprecedented volume system in Lightwave's history. All new features are very nice. However, Lightwave still chokes when have to do intense computations. Of course, this is a big problem because, usually, production demands heavy scenes and intense computations from the render engine. But, there's hope for Lightwave native render engine. With some tricks, it's possible to obtain decent render times when rendering more complex scenes. One thing to do is baking the textures when using complex shading networks. Another thing is never use brute force in the secondary GI (Lightwave 2020). I recommend to use a simple shader as oren-nayar brdf, for instance, when computing the irradiance cache. Never use a complex shading network or heavy textures when computing the irradiance cache to avoid long time computations.
Well, and what about the volumes system. It's better but still slow. What we can do, then? I've found out that it's better to use shading to do the volume, instead of using the volume scattering option in the render properties panel. Let's do it. This example is simple, but in a more complex scene, the lower render time pops up.
For this example, I created a plane (10x10m), a sphere and a box. The box will be our volume. I deleted the environment light and did the reset of the distant light. After that, I changed the distant light to a spot light and raised it a little bit from the ground. I also resized the box until it fills all the visible scene from the camera. We only have to avoid to put the camera inside the box (our volume). The camera must be outside the volume, always.


Now, we have to set up the light intensity (314 lx.) and I also put an image in the projection image drop down menu. In doing so, the image will affect the volume scattering and the Lightwave artist can create a lot of lighting effects in this way.


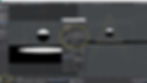
The camera setup:
Now, we have to set up the materials. The sphere uses a Principled BSDF with roughness set to 40%. The plane also uses a Principled BSDF but with the roughness set to 90%. However, what matters here is the box material, which is our volume. For it, I used a GGX BTDF, which is a transmissive shader. I put the color value to 128 (in a PBR workflow, pure white and pure black are never used), roughness to 0 and IOR (index of refraction) to 1, which is the ior value of the air.


Next, we have to connect the volumetric shader to the volume socket of the GGX BTDF shader to obtain the volumetric effect. The values have to be set up considering the size of the box. In this case, scale was set up to 5m and asymmetry to -0.5.


And we have our faster volume rendering.

Of course, this scene is simple, but in the next tutorial, I'll use this setup in a much more complex scene (and it works nicely!).
One last thing: I could have done this scene using nulls with the shape options instead of real geometry. Well, I don't recommend to use the mathematically computed shapes because they're slow to render, even in a light scene. Because of this, I always use real geometry.
And do not forget: Donation = Loving ❤
Help me to do more tutorials. Please, consider to make a donation if this content helped you.